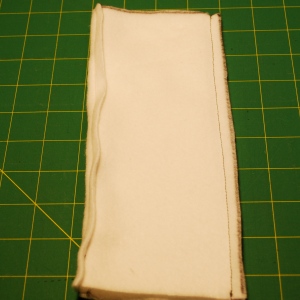
Beginner Project: Travel Tissue Case

Not only is this a great beginner project, but also a great gift!

Not only is this a great beginner project, but also a great gift!

Every few sessions, I teach this travel tissue case on the first day of my Sew Easy class.  It gets a new sewer used to the basic and most-useful stitches: straight stitch, zig-zag stitch, and backstitch.

Beginner or experienced, you’ll appreciate this quick project that makes a thoughtful gift AND uses up remnants!

The skills you will develop by sewing this case are:

  • cutting straight lines
  • sewing with straight and zig-zag stitches
  • reversing your machine for a backstitch

Supplies needed:

  • your basic sewing supplies
  • one 8 1/4″ wide by 5 1/2″ high rectangle of fabric
  • travel tissues
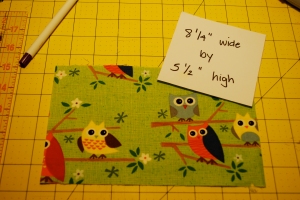
Use up remnants perfectly with this 8 1/4" x 5 1/2" rectangle

Use up remnants perfectly with this 8 1/4″ x 5 1/2″ rectangle

Begin by setting your machine to a zig-zag stitch and sewing the SHORT edges of your rectangle.  This zig-zag stitch will help prevent fraying.

Begin by setting your machine to a zig-zag stitch and sewing the SHORT edges of your rectangle. This zig-zag stitch will help prevent fraying.

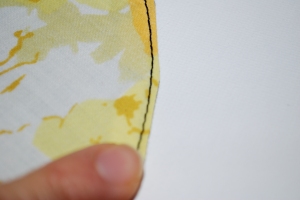
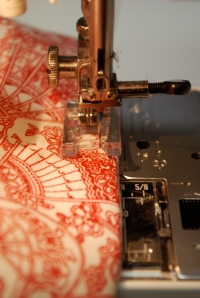
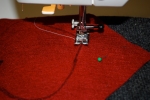
Close up of the zig-zag stitch.  Try to sew so that the right side actually goes off the fabric, wrapping around the raw edge.

Close up of the zig-zag stitch. Try to sew so that the right side actually goes off the fabric, wrapping around the raw edge.

Press the short ends you just sewed as shown, with a 1/2" hem. Do this to both short ends.

Press the short ends you just sewed as shown, with a 1/2″ hem. Do this to both short ends.

Change settings to a straight stitch and sew close to the zig-zag side.  Sew down each hem.

Change settings to a straight stitch and sew close to the zig-zag side. Sew down each hem.

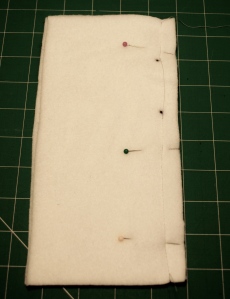
After sides have been hemmed, fold the rectangle, right sides together.  Bring the two ends to the middle and press.  Use four pins to hold fabric in place.

After sides have been hemmed, fold the rectangle, right sides together. Bring the two ends to the middle and press. Use four pins to hold fabric in place.

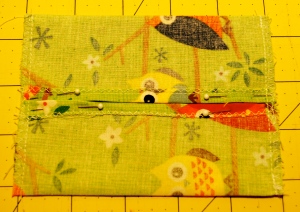
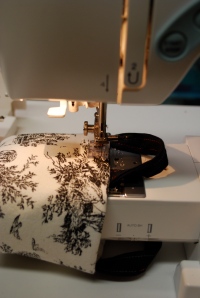
Line up the raw edge with the right side of your presser foot.  Backstitching at the beginning and end, sew a fabric/flaps together with a straight stitch. (depending on your machine, you'll be sewing with approximately a 1/4" inch seam allowance).

Line up the raw edge with the right side of your presser foot. Backstitching at the beginning and end, sew a fabric/flaps together with a straight stitch. (Depending on your machine, you’ll be sewing with approximately a 1/4″ inch seam allowance).

Now, change back to your zig-zag stitch and repeat sewing the same sides you just sewed with a straight stitch.  (You are now finishing this edge to prevent further fraying.)

Now, change back to your zig-zag stitch and repeat sewing the same sides you just sewed with a straight stitch. (You are now finishing this edge to prevent further fraying.)

Trim all threads (including any fraying and turn right-side-out!

Trim all threads (including any fraying and turn right-side-out!  Fill with travel-sized tissues and enjoy!

Not only is this a great beginner project, but also a great gift!

Sneeze happy!

Fabric Baskets

Fabric Baskets She Said Sew

Apologies for the yellowed photos. It’s been pretty dreary here and my photo quality is suffering!

My Winter 2013 Sew Easy class is making these little lined baskets–just in time to fill with Valentine’s Day treats!  (But they are perfect for every day, too.)  I keep one on my kitchen counter to hold all the odds and ends that haven’t yet found a home and a larger one next to my bed is full of magazines.  Fusible fleece gives these bags great structure, but for larger ones, try experimenting with a firmer fusible stabilizer like Pellon Craft Fuse.

The directions below are specific to my Sew Easy class, but you may size yours as you like.  Just make sure you begin with 4 pieces of fabric that are identical sizes and you’ll be successful.  (Remember that a larger basket will need a larger boxed corner.)  If you want more practice inserting linings, try making reusable snack bags which apply the same principles.

This is a great project for beginner sewing. The skills you will develop by sewing these bags are:

  • cutting straight lines
  • sewing straight lines
  • topstitching
  • understanding the concept of boxed corners
  • understanding the basics of lining a bag

Supplies needed:

  • your basic sewing supplies
  • two fat quarters or remnants in complementary patterns/colors
  • fusible fleece
  • matching thread

All seam allowances are 1/2″ unless noted

Step 1:  Fuse Fleece

Following directions on the fusible fleece, fuse to the wrong side of your exterior fabric.

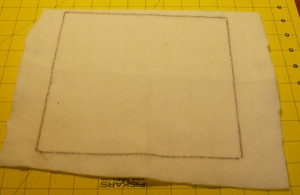
Drawing your rectangle directly on the fusible fleece prior to fusing can simplify this process

Drawing your rectangle directly on the fusible fleece prior to fusing can simplify this process

Step 2: Cut Fabric

Cut two pieces each from your exterior fabric and interior fabric.  For our class, we are cutting our fabric 12″ wide by 9″ high.  You will have a total of 4 pieces.

Make sure you have two pieces for the interior and exterior (4 total)

Make sure you have two pieces for the interior and exterior (4 total)

Step 3: Prepare Boxed Corners

In our class, we will make a 3″ boxed corner.  So, from each bottom corner (there are 4 total), cut away a 2″ square.  Why 2″?  Each square will contribute to half of the bottom and there is a 1/2″ seam allowance.  Thus, by the time the the bottom is sewn, only two 1 1/2″ halves will remain for a total of 3 inches.

Making a square template out of cardboard is a nice tool to keep for future bag-making.

Making a square template out of cardboard is a nice tool to keep for future bag-making.

Make sure you cut a square from all 4 pieces.

Make sure you cut a square from all 4 pieces.

Step 4: Sew Together Exterior and Interior Fabrics Sides

Backstitching at the beginning and end, sew the sides of like fabrics together.  Stop at the boxed corner.  Do not sew inside the boxed corner.

Basket Sides She Said Sew

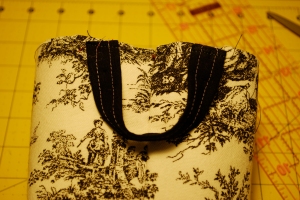
Note: if you want to add handles, decorative or functional, do this now by sewing them at even distances on each side of the seam.  Sew handles with a 1/4 ” seam allowance and reinforce by reversing and re-sewing a couple of times.

Sew it 1/4" so there isn't a chance of these stitches showing in the final product.

Sew it 1/4″ so there isn’t a chance of these stitches showing in the final product.

Step 5:  Sew Bottoms

For the exterior fabric, sew across the bottom, backstitching at beginning and end.  Stop at the boxed corner.  Do not sew inside the boxed corner.

Again, do not sew inside the corners!

Again, do not sew inside the corners!

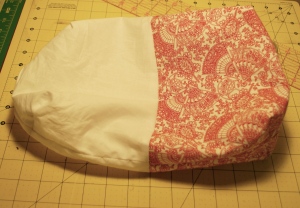
For the interior fabric, sew bottom as shown in this photo.  You are leaving a hole to turn the entire basket right-side-out.  The exit strategy I use will help the fabric turn inside and make swing the hole closed much easier.

Keeping the needle down in the fabric will serve as a "bookmark" and make pivoting easier.

Keeping the needle down in the fabric will serve as a “bookmark” and make pivoting easier.

Step 6: Sew Boxed Corners

Pinch squares together, matching seams.  Open seams (pinning will help keep them open) and sew across, being sure to backstitch at beginning and end.  Do this for both the exterior and lining.  Now you will have an unlined basket that sits upright.

Line up and open seams.

Line up and open seams.

Step 7: Insert and Sew in Lining

With exterior right-side-out and interior inside-out, place exterior inside interior.  Match seams and pull gently on sides to make sure there aren’t any large gaps.  If either interior or exterior is too large, take in at the seams.

Place the exterior inside the interior.  Right sides should be together.

Place the exterior inside the interior. Right sides should be together.

Free the arm of your machine and place basket over the arm.  Starting at one seam, sew all the way around–don’t worry, you aren’t sewing it shut because you left a hole in the lining where you will turn it right-side-out.

Modern machines should have a piece that is removable to make it possible to sew around a tube.

Modern machines should have a piece that is removable to make it possible to sew around a tube.

Step 8:  Finish Basket

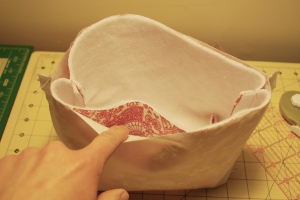
Using the hole in the bottom of the lining, turn basket right-side-out and sew the opening closed by hand or machine.   Tuck the interior inside the exterior fabric and press the top.  Finish with a topstitch 1/8″ to 1/4″ from the top.

This is how it looks once the exterior has been pulled through.

This is how it looks once the exterior has been pulled through.

I am using an applique foot to attempt to show you how closely to sew to the top.  Please don't use an applique foot yourself, though!

I am using an applique foot to attempt to show you how closely to sew to the top. Please don’t use an applique foot yourself, though!

Make sure the handle stays to the right (if sewing handles)

Make sure the handle stays to the right (if sewing handles)

Fill with treats and pass it along to a friend.  You can even creating a nesting set!

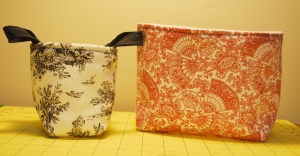
Sew a few and create a nesting set!

Sew a few and create a nesting set!

Valentine’s Day Reverse Applique Pillow

Image This is a fairly simple pillow to make.  You can make it with a zipper (as I have) or sew a simple pillow. What you’ll need:

  • basic sewing supplies
  • pillow form (size of your choice)
  • two rectangles or squares cut 1″ larger than form (for example, if you have a 12″ square form, cut two 13″ squares; if you have a 16″ x 10″ rectangle, cut two 17″ x 13″ rectangles)
  • a paper heart cut to about 1/2″ larger than the size you want to show on your pillow
  • a scrap of fabric a little bigger than the paper heart you’ve cut

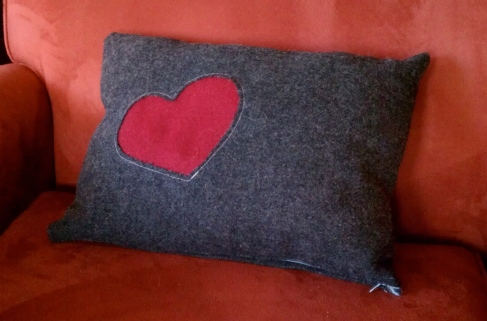
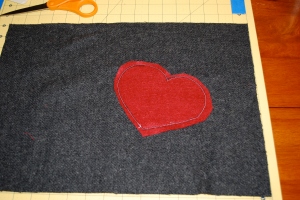
Steps 1 and 2: Trace and Place the Heart Using the paper heart you’ve cut, trace the heart onto the WRONG side (back side/unprinted side/side you don’t want to show) of the scrap of fabric. Then place the fabric RIGHT side down onto the WRONG side of your pillow fabric.  Place it where you want the heart to show.  Pin in place. Be sure your heart is at least two inches in from the sides and top to avoid it curving too much or being sewn into the seam allowance. You’ll see from the photo at the top, I placed mine at an angle off to the side. Step 3: Sew on Heart Sew heart onto pillow fabric.  Be sure to backstitch at the beginning and end.  Begin sewing a couple of inches above the “point” at the bottom of the heart.  If you start and end at the point, you risk missing a couple of stitches, thus creating a weak spot that will open over time. If you have an applique foot (clear, plastic presser foot), use this–it will help you see better as you curve around the heart. DSC_0032     Step 4:  Trim Excess from Front and Back Remove pins and cut away the excess fabric from the heart (in my case, the red fabric).  Then, turn over the fabric and carefully snip a hole in the center of the heart only going through the pillow fabric, not the fabric underneath.  Cutting away the pillow fabric will expose the reverse applique heart shape you see on the finished example above.  Do not cut against the stitching, but aim for about 1/4″ or more away.  For mine, I trimmed it with shears and then cut away the shape with pinking shears for an additional decorative effect. Now you have a plain back panel and a front panel with a reverse applique ready to turn into a pillow.

DSC_0038

Trim away excess from the heart.  The stitches on the opposite side will help guide you to cut away the center of the heart an expose the fabric underneath.

Step 4: Turn Panels into a Pillow Now, using your favorite method, adding a zipper or not, turn these panels into a pillow.  I like to add a zipper and make all of my holiday pillowcases the same size because I have one pillow form I recover for each holiday instead of having loads of little pillows I can only use for a short time each year.

Standard Pillowcase Tutorial

This is a great beginner project because it gets right to the heart of cutting and sewing straight lines.  It’s easy to modify this project, too, by adding piping or ribbon.  These make excellent gifts and only take 1 (total) yard of fabric. Make sure you take a look at the finished pillowcase at the end of the post so you understand where the fabric you select will go.

A note about fabrics: select your fabric from the cotton or quilting section (rather than the apparel or home dec sections). Quilting cotton generally comes in a 45″ width, but some fabrics are a few inches less or even an inch or so wider. If the fabric you love is 42″, don’t worry, you’ll still have enough fabric.  Feel free to mix and match patterns or a solid and pattern. Do not use stretch or knit fabrics, stick to 100% cotton woven fabrics (flannel works) for the best success.

Materials List:

1/4 Yard 45” Fabric (for header)

3/4 Yard 45” Fabric (for body)

Matching thread


Seam Allowance: 1/2”


Terms to know:

Selvage: The manufacturer’s edge of the fabric.  Often copyright, color swatching and basic information is printed on the selvage.  This edge is “sealed” and will not unravel like a raw edge or seam.

Raw Edge: Where the fabric has been cut

Raw Seam:  Where the cut edges of two (or more) pieces of fabric have been sewn together

Straight Stitch:  Quite simply, a series of stitches that make a straight line (——)

Overcasting: A zig-zig or actual stitch (see your manual) that is used to “finish” a raw seam ( /\/\/\/\/\/\/\ or _/_/_/_/)

Instructions:

standard pillowcase instructions pdf

Step 1: Prepare the Header

Take the 1/4 yard of fabric and fold and press flat lengthwise with the pattern side out.  You will have a long, thin strip of fabric that measures approx. 4.5 x 45 inches:

Step 2: Prepare the Body

Take the 3/4 yard of fabric and open it up and press.  This will measure approx. 27 x 45 inches.

Step 3: Attach Header

Place the body piece down, fabric side up and place the header on top.  Match the header to the body with raw edges together.  If one piece is longer than the other,  center shorter piece.

Pin the three edges together, going through all pieces of material and crossing the cut line with the pins.  The point should face the raw edges.

Sew a straight stitch down the length of the header.  Raw edges should be to the right.  Remove pins.

Trim edge to approx. 1/4”.  Then repeat by overcasting.  Trim threads.

Step 4:  Finish

Fold back the header and press.

Fold the pillow case in half with printed sides together (it should look like an inside-out pillow case now.  Using a straight edge, trim off any excess fabric.

Pin the two sides with raw edges (it will be an “L” shape).  Straight stitch and overcast as you did with the header.  Trim threads.

Clip corner.

Turn right side out and insert a fluffy pillow. Take a nap–you did it!

Sweet Stitches for Valentine’s Day

DSC_0375IMAG2533DSC_0174

DSC_0087DSC_0374DSC_0363

I love Valentine’s Day!  Truly, I do.  When I was a girl, my mom made a big deal of Valentines with special treats, gifts, decorations and my grandmother’s sour cream cookies.  I never considered it a romantic holiday until I was much older and met my would-be spouse at a Valentine’s Day dance.  Lucky, lucky me!

So there’s a little backstory for you.

Especially here in the dreary Midwest, I find Valentine’s Day decorations the perfect remedy for the post-holiday, wintertime blahs.  You can’t go wrong with cheerful colors, candies and kind wishes for our friends!  For the next couple of weeks, I’ll post some Valentine’s day favorites and a few tutorials, too.  If you want to be sure you get every post, please subscribe (“Sew With Me”–to the right)!

Reverse-Appliqued Heart Pillow

Using one of my favorite applique techniques, I made this pillow last year.  Some of you may remember it from class.  Tutorial next week!

DSC_0032DSC_0038IMAG2533

Valentine’s Day Appliques

I love making appliqued shirts for the me and my boys.  Of course, you can applique a simple heart, but it’s fun to make an applique that uses hearts to replace another object.  Here are the boys’ Valentine’s Day shirts from last year.  You’ll see I replaced the dump truck rubble and leaves with hearts.  This year we may do Pac Man, replacing the pellets/pac-dots with hearts or some sort of robot.

DSC_0087DSC_0101DSC_0174

Tree of Love

In our foyer, we keep a little “tree” of twigs the boys have gathered on our adventures.  The addition of these hearts make a cheery greeting for all.  I saw something similar on Pinterest.  It was from a round-up and I couldn’t find the original source.  Perhaps it’s Martha? Regardless, I loved that i could do this project quickly and had all the supplies at hand.  (The original photo I pinned shows twine and a blanket stitch instead of the embroidery floss and whipstitch I used.  While I like the twine better, that would have required a trip to the store…and the blanket stitch would have taken a bit longer. Lazy me!)  Find the tutorial soon, although I doubt you need one!  These little hearts have a secret, though…

DSC_0363DSC_0365DSC_0375

Valentine’s Day Mini Birdhouse Garland

Find the tutorial here at my other blog.  I love this garland so much, I believe it will stay up through spring.  Sure, there isn’t any sewing (unless you replace the roof with felt), but it was so sweet I wanted to share.

DSC_0378

I’d love to hear from you and know what Valentine’s decorating plans you have for 2013!

More Gifting: Elastic Mason Jar Toppers

Those of you who have sewn with me know I love to garden and make preserves, too.  This year I canned a lot:  marinara sauce, pickled green tomatoes, roasted red pepper spread (the best thing I made this year), peach salsa, peach butter, jalapeno jelly, orange marmalade, and blackberry jam.  Spoiler alert:  if you invite me to your house this holiday season you’ll probably receive a few of these!

DSC_0453

I like to cover my jars a few ways, but my favorite is with an elastic jar topper.  They use up remnants and present your preserves perfectly.  Plus, it allows you to remove the ring so you can use it again.

This is a great project for advanced beginner sewing. The skills you will develop by sewing these bags are:

  • cutting circles
  • sewing in a circle (sewing around)
  • sewing with elastic thread

Supplies needed:

  • your basic sewing supplies
  • woven fabric remnants of two different fabrics
  • elastic thread (I like Gutermann)
  • optional: 1/4″ elastic (in case you have difficulty shirring with your drop-in bobbin machine)
  • circle elastic jam jar templates PDF

ALL SEAM ALLOWANCES ARE 1/4″

Step one:  Cut Circles

Place fabrics right sides together (place a couple of pins if you don’t want the fabric wiggling).  Use the template, draw a circle with a protractor or find a plate/tin, etc. to trace.  Cut two circles; one from each fabric.  For wide mouth you will need a 7.5″ circle, for small mouth, you will need a 6.5″ circle.

DSC_0423

Step 2: Sew Circle

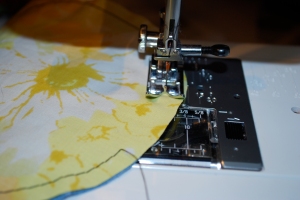
Keeping circles right sides together, sew all the way around, leaving a small space for turning.
DSC_0427

Step 3: Turn Right-Side-Out

Clip notches into fabrics and turn right side out and press.

Notches will prevent buckling as it removes the excess fabric before turning it right side out.
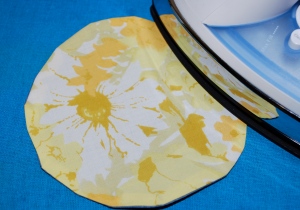
Notches will prevent buckling as it removes the excess fabric before turning it right side out.

Take care to make sure seams are pushed out.  You may want to use a chopstick to run along the inside of the seam.  Take care when pressing the opening.

Take care to make sure seams are pushed out. You may want to use a chopstick to run along the inside of the seam. Take care when pressing the opening.

Step 4: Topstitch

Topstitch as closely to the edge as possible.  This will also close the opening.

DSC_0431DSC_0433

Step 5: Sew on elastic

Find the center and draw a 3.75″ circle for the small mouth and 4.5″ circle for wide mouth jars.

DSC_0439

Take an empty bobbin and wind by hand.  Do not pull the elastic, but do not leave it completely slack as you wind it.  I try not to think about it too much and wind it quickly and evenly.  Place bobbin in bobbin case, but do NOT feed it through the threading slot.  Instead, the elastic should come up through the needle plate without any tension.  (You’ll feed the bobbin thread as you always do, holding the upper thread tightly toward you and turning the hand wheel.)

Elastic will come up through the plate as shown.  If you need help, there are plenty of tutorials and You Tube videos to help you.

Elastic will come up through the plate as shown. If you need help, there are plenty of tutorials and You Tube videos to help you.

Set stitch length at longest (4 or 5) and thread tension at the highest (probably 9).  With the right side up, sew around the circle and backstitch at the end to secure.

As you sew, it will begin to gather.  A quick steamy press will cause the elastic to gather even more.

As you sew, it will begin to gather. A quick steamy press will cause the elastic to gather even more.

Give the elastic a good steam with your iron.  Tada!

DSC_0446

Note:  If you have a drop-in bobbin machine, you may have to do some research on elastic shirring.  Front loading machines have higher bobbin tension.  You can counter this by adjusting your tension on your bobbin case (which I don’t really recommend for new sewers; buy a second case and adjust that one if you want to go this route).  You can also research shirring for your particular machine–there is a lot on YouTube!

Another Option for Sewing Elastic

You can always sew on 1/4 inch elastic:

Follow steps 1-4 as written.  Cut an 8″ piece of 1/4″ elastic for small mouth jars and a 10″ piece of 1/4″ elastic for wide mouth jars. Find the center and draw a 3.75″ circle for the small mouth and 4.5″ circle for wide mouth jars.

Mark the half-way points on circle and elastic.  Place the elastic at one of the circle marks and, as you sew, try to make the midway point on the elastic meet the second midway point on the circle.

Don't pull on elastic until you have stitched and backstitched.  Once stitches are secure, you can begin to pull the elastic.  Sew carefully down the center of the elastic.

Don’t pull on elastic until you have stitched and backstitched. Once stitches are secure, you can begin to pull the elastic. Sew carefully down the center of the elastic.

Backstitch to get sewing machine going over the elastic.  As you sew, gently pull elastic taught, making sure the dots line up with lines on the fabric.  Do not pull the fabric.  If you have extra elastic when you return to the start, simply cut it away.

It will gather as you sew.  Just take your time and you'll be happy with the results.

It will gather as you sew. Just take your time and you’ll be happy with the results.

By the way, if you don’t have time to sew an elastic topper, there are always these quick solutions!

DSC_0419

Felt is easily cut and threaded with ribbon or embroidery floss for a cute no-sew topper. Adorn with cinnamon sticks, mini pinecones, buttons, etc. to really set it off. Or, pink a quick circle and lock it down with the ring.
DSC_0421

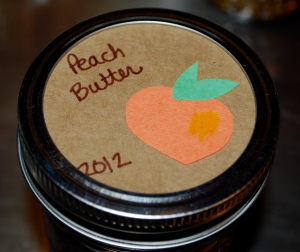
Get the kids involved and use a paper bag for the lid cover and cut out images from scraps of paper or felt and glue on top of brown paper. Screw on cap to hold it on. Or, if you want to go an even easier route, purchase scrapbook stickers and use those!

Finally, if you like wrapping your jar toppers with twine, this is a total indulgence, but you can buy beautiful twine at Gardeners Supply.

A side note:  NEVER recycle a mason jar!!!  If you aren’t going to reuse it, return it to the giver or another person who cans!!!  I never expect my jars to be returned, but it sure is nice when someone does! 🙂
Pajama Monsters

Pillowcases made out of felt with boxed corners couldn’t be easier. Customize for the little person in your life and enjoy having those PJs tucked out of sight.

Since the boys’ PJs end up tossed on their beds anyways, I figured why not let a cute monster gobble them up? Essentially, the pajama monster is an envelope-backed pillowcase made in felt.  Start with a few rectangles and then cut any or as many of the following as you’d like:  eyes, horns, teeth, cheeks/rouge, nose, lips, tongues, etc.  Just free-cut these and place on your large rectangle to get a feel for how they will look.

In my example, I made mine a princess monster:  ears, crown, eyes with eyelashes, nose, single tooth because this monster is going to a little princess we know.  Partner this with a book and a cute pair of (handsewn!) PJs as we did here, and you have a great gift:

The fabric you see was used to make super comfy PJ pants and an appliqued PJ tee to match.

Supplies needed:
  • your basic sewing supplies
  • One 14″ wide by 16″ high rectangle of craft felt
  • Two 14″ wide by 10″ high rectangles of craft felt
  • Scraps of other colors of felt for features like eyes, ears, teeth, etc.

Ideas for future:

Add buttons, ribbons, ric rac, ruffles and more to add even more dimension.  Try experimenting with the shape of the pillow.  Of course, you can get very, very detailed here–just remember who you are sewing for!  These will receive some serious “love” (er, abuse).

NOTE: ALL SEAM ALLOWANCES ARE 1/2 ” UNLESS NOTED!

(You can click on any photo to enlarge it.)

Step 1:  Cut pieces

Cut  the pieces for your monster’s features.  Eyes, ears, teeth, horns, glasses are just a fews suggestions.  Just remember that any layered features (like pupils on eyes) may have to be sewn together before sewing them on the monster.  Here are a couple of examples of Pajama Monsters from my Sewing for the Holidays class:

Aren’t these guys cute?

Step 2:  Attach Features

Attach the features to one of the small rectangles.  Think about the order they will have to be sewn on and sew accordingly.

I begin by laying out my rectangles and experimenting with features. Once I am satisfied with placement, I remove the large rectangle and bottom small rectangle and begin pinning and sewing the features in place.

To get the princess face, I began by sewing the pupils to the eyes, then I sewed on the eyelashes and nose to the “face” (rectangle), finally I sewed the eyes in place and then added the tooth.

Place all ears, horns, etc. at least 2 inches in from the sides, or they will be cut off when making boxed corners!

You can experiment with sewing features elsewhere, but it works best to only sew on the top rectangle.

Step 3:  Sew Pillowcase
Place the small rectangle on the bottom half of the large rectangle.  Place the other small rectangle (the “face”) on top.  The lower rectangle should fit into the bottom of the rectangle and the face rectangle should fit in the top.  The two small rectangles will overlap in the middle.  You want this overlap to help keep the pajamas inside.

Can you see how the three rectangles are layered here?

Pin into place and sew all the way around the rectangle.  Backstitch at start and stop.  If you’d like, trim the edges with pinking shears.  Otherwise trim back with regular scissors.

Use plenty of pins!

Step 4:  Sew Boxed Corners
Cut a 1.5″ square from each corner and then pinch the corner shut, matching seams.  Pin together and sew.

1.5″ squares cut from each corner will give pillow depth–just be sure those horns or ears are at least 2″ away before cuting.

Pinch corner together so the seams match up. Sew this closed being sure to backstitch at beginning and end

And there you have it–a little monster to hold your little monster’s pajamas!


SLR/DSLR Camera Strap Tutorial

A few years ago I spied another mom wielding her Nikon DSLR with a fabric strap.  My camera and I instantly felt underdressed and I vowed to make one for myself.  Three years later I finally got to the project!  I began with making a simple strap cover–but I didn’t like how it slipped, even though it did make the strap much more comfortable.  Eventually I moved onto complete straps and tried them with and without pockets, with different widths of webbing, etc.

It took many wrong purchases and about 10 prototypes before I settled on the strap you see here: a fabric strap with a double layer of fleece and one pocket to hold my lens cap.  For my own strap, I have also added a quick-release set of buckles.  That way I can swap out straps easily and, since I frequently use my tripod, it allows me to easily set the camera in place.  But that will be a post for another day!

Shhhh…  This is my “it” gift this holiday season since many family members have recently acquired their own DSLR cameras.

Supplies needed:

  • your basic sewing supplies
  • 2 strips woven fabric 36″ long x 3.5″ wide (think about how fabric will wrap around neck when choosing)
  • 2 strips fusible fleece 35″ long x 3.0″ wide
  • 1 strip woven fabric 6″ long x 3.5″ wide (for pocket)
  • 30″ of 3/8″ or 1/2″ webbing (I buy mine from Strapworks)

Ideas for future:

Add buttons, ribbons, ric rac, ruffles and more to add even more dimension.  Try experimenting with the shape of the end of the strap. (You can also cut out vinyl end pieces or repurpose scraps of leather for the end pieces, but they can be difficult to sew and I haven’t found it to be that much more durable.)

NOTE: ALL SEAM ALLOWANCES ARE 1/4 ” UNLESS NOTED!

(You can click on any photo to enlarge it.)

Step 1:  Fuse Fleece

On the wrong side of both long strips, center fleece (bumpy side down) and fuse.  You may find it easier to fuse it from the fabric side.  While you are at the iron, fold the pocket piece so it measures 3.5″ x 3″, wrong sides together, and iron.

Center the fusible fleece as well as you can on the wrong sides of the strips. Don’t fret, it doesn’t have to be perfect.

You can connect pieces of fusible fleece by overlapping pieces a little bit.

Step 2:  Sew on Pocket

Sew along the folded edge, about 1/4″ down.  Feel free to play with a decorative stitch here–but don’t forget to switch back to your regular stitch if you do!

Measure 3″ from the bottom of one of the fabric strips.  Place pocket right side down (if you have a right side) and sew the raw edges to the right side of the strip.  Fold the pocket up so that the raw edge is enclosed and iron the pocket so that it is smooth and flat on the strip.

Basically, you are lining up the pocket with the end of the strap. The folded end is what matches up with the end.

Place the pocket piece right side down. Sew pocket 1/4″ from the raw edge (not the folded edge). Then fold pocket up and press well.

Here is the pocket after being pressed. It is now a pocket that sits 3″ from the end. You can also see the top stitching along the top of pocket here.

Step 3:  Sew Strap Together

Place strips right sides together, being sure pocket stays flat, and sew down each long side.  If you go onto the fleece a little, do not worry.  Turn strap right-side-out and press well.  Tuck in the raw ends 1/2 inch and press.  If you like, you may press and then topstitch along each side (1/8″), but it is not necessary.

Sewing with a 1/4″ seam allowance means you should sew right along the edge of the fleece. It’s OK if you sew onto the fleece a bit.

Fold raw edges inside 1/2″ (or, to the fleece, which should be about 1/2″ from the end).

Step 4:  Attach Webbing

Mark out a 3″ wide x 1.5″ high rectangle on each end.  Using your ruler, make an X in the rectangle and then draw a line down the middle of the X.  Insert the webbing under this line being sure the webbing extends a 1/4″ or so beyond the top of the line/rectangle.  Beginning at the bottom of the line (center of bottom of rectangle), sew over this X and line at least 6 times.  You do not want the webbing to fall/rip out!  Avoid reversing.  Instead, always stop with your needle down and pivot to turn around.

I draw on my marks for the webbing with a disappearing ink pen.

The webbing should extend just a bit farther than the center line.

I usually sew around the rectangle 6 times before moving to each of the center lines. Then, I sew each of the center lines 6 times as well.

The finished stitching.

Step 5: Cut/Melt Webbing Ends

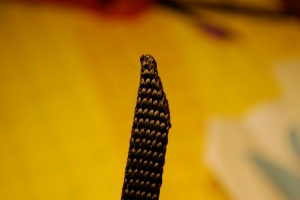
Cut the ends of the webbing at an angle to make it easier to thread through the camera openings/loops.  The ends of the webbing will fray enough to make threading it nearly impossible to thread.  So, you can use a flame (like from a butane lighter) to melt the ends or use Mod Podge or Fray Check to seal the ends.

An angled cut is best for threading the webbing back into your camera.

You’re done!  Use the hardware that came with your camera and loop it through!

All done and ready for a camera!

Fleece Fingerless “Gloves” Tutorial

Smartphones are great, but they’ve made wearing gloves a bit tricky!  Pair these gloves with a cute infinity scarf-style cowl and you’ll have a great gift to give this winter.  Best of all, both projects are simple and the pair can be done with 1/2 yard of fleece.  This is another great project for beginning sewing, which is why I frequently teach or highlight it in my fall/winter classes.  The skills you will develop by sewing fingerless “gloves” are:

  • continuing to develop cutting and straight-line sewing skills
  • sewing with fleece
  • sewing a tube/around a circle

Supplies needed:

  • your basic sewing supplies
  • Fabric: remnant of fleece (or 1/2 yard fleece if making the infinity cowl, too)
  • Sharpie or chalk

Ideas for future:

These look great as is, but consider hand sewing some embellishments on them after they are finished.  Vintage buttons, fabric flowers, ribbon, will make these even more charming!

NOTE: ALL SEAM ALLOWANCES ARE 1/2 ” UNLESS NOTED!

(You can click on any photo to enlarge it.)

Step 1:  Draft pattern and cut out fabric

Take a blank piece of paper and draw a 4.5″ wide by 9″ long rectangle.  Then, measure in 1/2″ from the left side and put a dot 1 5/8″ down and another 3 5/8″ down.  It will look like this:

Then, cut out your pattern and poke small holes through the dots.  Cut four rectangles from your fabric and transfer the dots.  Since fleece is so plush and it can be difficult to pin through multiple layers, I often trace my pattern and then cut, like so:

Step 2: Sew inner seam

The side with the dots is the inner seam (the side with the thumb hole).  Take two rectangles and place them right sides together.  Pin well.  Begin sewing at the top–backstitching–and sew to the first dot.  Stop and backstitch before lifting the needle and presser foot and advancing to the next dot.  Put down presser foot.  Lower needle and  begin to sew–backstitching at the beginning and the end.   Clip the  thread over where you advanced. Repeat for remaining rectangles.

This is a close-up of the area between the two dots (thumb hole). Advance here by lifting the needle and presser foot and sliding fabric away until the 2nd dot is lined up under the needle. Lower needle and presser foot and continue. Don’t forget to backstitch at each dot.

Step 3: Reinforce inner seam

Open seam, pressing each raw edge its side and pin.  Sew a 1/4″ seam allowance down each side of the inner seam, backstitching at beginning and end.

From the wrong side

From the right side. You sew all the way down each side of the seam. The hole is already in place so no need to advance.

Step 4: Sew outer seam

Fold glove so right sides are together and sew outer seam, backstitching at beginning and end.  At this point, try on the glove to make sure it’s not too baggy for your hand or the person you are sewing for.

Technically you could stop right here. Since you are sewing with fleece, the raw ends won’t fray. But it looks much nicer with the hems sewn.

Step 5: Finish top and bottom hems

With gloves inside out, finger press a 1/2 inch single fold hem (this means fold the fabric only once) and pin generously.  Freeing the arm of your machine or working carefully on the top, sew all the way around the tube.  If the arm of your machine is too big (as most are), just sew slowly, careful not to stick yourself or to sew hem to another part of the glove.  Turn right side out and your gloves are complete!

Lots of pins and a slow speed will help make this step successful.

All done!

You can choose to embellish at this point by adding a few decorative buttons.